
This is a short tutorial where I’d like to show you how to make a search field in your plugin or theme using WP REST API. This search field includes nice autocomplete, but doesn’t use any jQuery as one might expect. It’s built with pure JavaScript which is faster, saner, more efficient — why so read here.
This is a basic version. It searches: posts from current domain by title and does nothing with received data (but you can :))
Download the result code from here to try it yourself. It’s wrapped as a plugin for your convenience — just go ahead and install it.
You can use this as a foundation to build all sorts of cool things: search another site’s database, search by content, search other post types, like WooCommerce products, events etc, include terms and archives into search, process received data in any possible way. I guess the list is close to endless.
I use exactly the same method in my plugin, SpeedGuard to add pages which speed should be monitored. It searches through all public custom post types, and also terms, by title and by content, and processes the picked item to create a new PageSpeed Insights test. (code can be found here).
Quick preparation: set up plugin’s page with a search field
First, I made a simple empty plugin with an admin page, so we have a place where we can have fun 🙂
I also added a search field to that page (see line 41) along with 2 hidden fields to pass additinonal data (post ID and post permalink in this case).
At this point, we have a simple plugin that does nothing more but adds a page to your Tools menu with an input field on it.
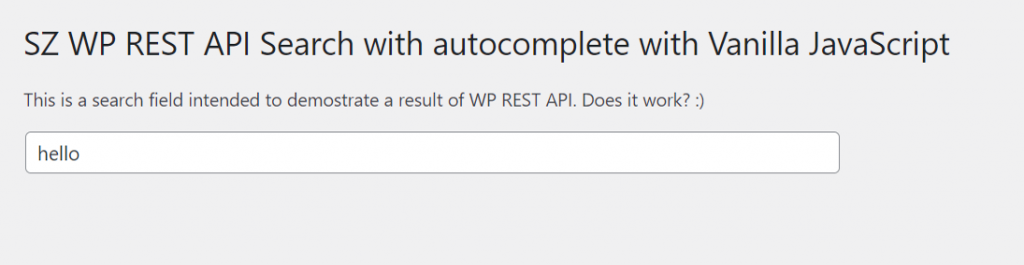
If you type something inside nothing happens. For now.
Well, now everything is ready to get this party started!
Part 1: Set up WP REST API search
If you never did it before you’ll be amazed how easy that is, I guarantee.
Create a custom WP REST API endpoint
Basically, tell WordPress where you want it to be accessible, and what you want it to do. We do that with rest_api_init()
Fire it:
add_action( 'rest_api_init', array( $this, 'rest_api_init') ); // Initialize the REST API routes. And do the thing using register_rest_route() function:
function rest_api_init() {
register_rest_route( 'sz-search', '/search', array(
'methods'  => 'GET',
'callback' => array( $this, 'sz_rest_api_search'), //exactly how we search
'permission_callback' => function( WP_REST_Request $request ) {
return current_user_can( 'manage_options' ); } //Restrict endpoint to  internal calls
) );
}
We use GET method here.
Then 'callback' — is a function to execute to run the search, we’ll get to it in a minute.
And 'permission_callback' is to limit access to this WP REST API endpoint to users that have ‘manage_options’ capability (admin in single install and network admins in Multisite).
401 error rest_forbidden
Your newly created WP REST API endpoint is accessible here now: https://yourdomain.com/wp-json/sz-search/search?term=searchtermhere
If you navigate there via a browser you will receive a 401 error, which is perfectly fine.

This is exactly what should be expected with what we have currently in'permission_callback' argument.
WP REST API authentication
You can adjust the access limitations according to your needs.
For example, if you comment out that argument your WP REST API point will be accessible for all and everyone, no matter if they have any capabilities at all (if they are a WP user) or accessing from outside, no authorization at all. That’s why you need to be careful with those settings and permit the access only in case you want to do so.
To check the capabilities of a user and/or an application requesting our custom WP REST API endpoint we’ll be checking a nonce. And to send that nonce (basically, to introduce ourselves) we’ll use wp_localize_script — we’ll get to it just in a couple of minutes.
Set up how, what and where you’d like to search:
As a ‘callback’ we have this function that configures exactly what, where and how we want the database to be searched:
function sz_rest_api_search( WP_REST_Request $request ) {
         $search_term = $request->get_param( 'term' );//Our input from the field
         if ( empty( $search_term ) ) {
             return;
         }
             //The way we're gonna search
             $args = array(
                 'post_type' => 'post',
                 'post_status' => 'publish',
                 'posts_per_page'   => 3,
                 'fields'   => 'ids',
                 's'             => $search_term,
                 'no_found_rows' => true,
                 'update_post_meta_cache' => false,
                 'update_post_term_cache' => false,
                 );
             $the_query = new WP_Query( $args );
             $this_blog_found_posts = $the_query->posts;
                 $temp = array();
                 foreach( $this_blog_found_posts as $key => $post_id) {
                     $temp = array(
                         'ID' => $post_id,
                         'permalink' => get_permalink($post_id),
                         'label' => get_the_title($post_id),
                         );
                     $posts[] = $temp;
                 }
        if (!empty($posts)) return $posts;
}
First, we make sure we actually know what to search by checking $request.
Then we perform a regular WP_Query with search parameters. In this case we have the folowing conditions: post_type, post_status and the keyword we entered in the input field should be in the title.
Then, if we managed to find a result matching these conditions — we form push it to a new array $temp.
Along with found post’s ID we also get and add there a post title and a post permalink — so we can use them later on.
In the end we just return this array of results in $posts.
Part 2: make WP REST API work with the search field with autocomplete
Now let’s make an autocomplete!
Enqueue styles and scripts needed
I use Awesomplete widget. It’s pure JavaScript, simple to use, it weigths only 2KB, it’s cool!
First, let’s add its JS and CSS files:
			wp_enqueue_style( 'awesomplete-css', plugin_dir_url( __FILE__ ) . 'awesomplete/awesomplete.css'); //Awesomplete widget
			wp_enqueue_script('awesomplete-js', plugin_dir_url( __FILE__ ) . 'awesomplete/awesomplete.js'); //Awesomplete widget
Then, this line will add our own JS file where we’ll put a code to initialize and customize Awesomplete:
wp_enqueue_script('sz-search', plugin_dir_url( __FILE__ ) . 'search.js', array('awesomplete-js')); //Our Awesomplete settings are hereWe also need to use wp_localize_script here to pass data for our WP REST API endpoint: search url and nonce for WP REST API authorization:
 wp_localize_script('sz-search', 'szsearch', array(
 'search_url' => home_url( '/wp-json/sz-search/search?term=' ), // URL to access REST API endpoint
 'nonce' => wp_create_nonce('wp_rest') ) //For authorization
 );
 }
And configure autocomplete:
The following code (located in search.js) initializes Awesomplete on the page and contains all the configuration.
The code is pretty straight-forward and I tried to comment it in detail, but please feel free to drop a question in the comments if you have any.
document.addEventListener('DOMContentLoaded', function() { //wait till page is ready
     const min_letters = 2; //minimal characters to start searching
     var autocomplete_field = document.getElementById('sz-search-field');//our search field id here
     var awesomplete_field = new Awesomplete(autocomplete_field); //creating a new instanse of autocomplete widget
     autocomplete_field.addEventListener('keyup', function() { //start doing smth after user presses a key
         var user_input = this.value;  // Just let's use another variable for developer clarity
         if ( user_input.length >= min_letters ) { // Check if there are enough letters in the field
             fetch(   szsearch.search_url + user_input, { //we are using Fetch API to make request/process the response
                 method: 'GET',
                 headers: {
                         'Content-Type': 'application/json',
                         'X-WP-Nonce': szsearch.nonce, //Check the nonce we generated before
                       }
             })
             .then( response => {
                   if (response.status !== 200) { //If smth is not right
                     console.log('Problem! Status Code: ' +
                       response.status);
                     return;
                   }
                 response.json().then( posts => { //We found something!
                 var results = []; //Let's extact information that we need: Post ID, Permalink and Title
                     for(var key in posts) {
                         var valueToPush = {};
                         valueToPush["label"] = posts[key].label; //passing post title
                         valueToPush["value"] = { id: posts[key].ID, permalink: posts[key].permalink}; //we are passing post ID and permalink here
                         results.push(valueToPush);
                     }
                 awesomplete_field.list = results;  // Update the Awesomplete list
                 awesomplete_field.evaluate();  // And tell Awesomplete that we've done so
                 })
                 .catch(function(err) {
                     console.log('No results');
                 })
                 })
                 .catch(function(err) {
                     console.log('Error: ', err);
                 });
         }
     });
     awesomplete_field.replace = function(suggestion) {
         this.input.value = suggestion.value.permalink; //Replace search input with permalink in the field
         document.getElementById("sz_result_permalink").value = suggestion.value.permalink; //Assign permalink value to the hidden field
         document.getElementById("sz_result_id").value = suggestion.value.id; //Assign post ID value to the hidden field
     };
 });
A couple of things to note:
'X-WP-Nonce': szsearch.nonce — this is where the authorization to access WP REST API is performed
awesomplete_field.replace — this is where we assign the values of the post that we found to our input fields (search field and 2 hidden fields).
That’s it!
- Now you have WP REST API endpoint set up
- It’s connected with the search field
- It searches your database when you type more than 2 characters in the field
- It suggests a few matches to choose from (autocomplete)
- If you select one of the suggestions its values are passed to the input fields as values (so you can use it somehow later)
Cool, isn’t it? 🙂
Again, the result plugin can be downloaded from here.
Part 3: Use search results the way you need them
So, once you click the matching post — its ID, title and permalink are assigned to the input fields. In this small plugin I made for this tutorial nothing happens, data doesn’t go anywhere.
This is up to you to decide how you need to use it after.
For example, in my plugin, SpeedGuard I use post ID, title and permalink to create a new PageSpeed Insights test:
Wrap up
I hope this tutorial will help you to build something cool using WP REST API without jQuery, with vanilla JavaScipt only.
If you’re interested in doing more stuff with vanilla JS instead of the old-fashioned jQuery way check out Replacing jQuery with Vanilla JavaScript in my WordPress plugin
Again, the plugin with all above is here.

Leave a Reply